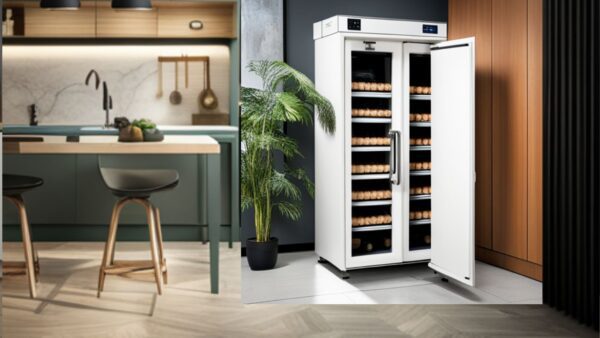
Welcome to our comprehensive guide on “Dry Cabinet Not Working.”
We understand that encountering issues with your dry cabinet can be frustrating, especially when you rely on it to protect your precious equipment from moisture damage.
But don’t worry, we’re here to help.
This guide will delve into the 15 most common causes of a malfunctioning dry cabinet and provide practical fixes to get it back up and running.
Dry Cabinet Not Working
1. Power Supply Issues
Cause
In some instances, dry cabinet malfunction can be traced back to power supply issues.
This can be due to a variety of factors such as faulty wiring, unstable voltage, or a non-responsive power switch.
Faulty wiring can interrupt the flow of electricity, while unstable voltage can cause the cabinet to malfunction. A non-responsive power switch can also prevent the cabinet from turning on.
Solution
Addressing power supply issues often requires a professional touch. However, there are preliminary steps that can be taken.
Firstly, check the power cord for any visible signs of damage and ensure it’s properly connected.
Secondly, try plugging the cabinet into a different outlet or use a voltage stabilizer if voltage instability is suspected.
If the problem persists, it’s advisable to seek professional help as the internal wiring or power switch may need repair or replacement.
2. Faulty Electrical Wiring
Cause
Faulty electrical wiring, more often than not, is the direct result of improper installation or aging.
In many instances, it may also be due to the usage of substandard materials which, over time, are unable to withstand the electrical load, leading to malfunctions or even fires.
Faulty wiring can cause significant safety risks, including electrical fires and shocks. It is often hard to detect, making it even more hazardous.
Solution
The best solution to faulty electrical wiring is regular inspection and maintenance by licensed professionals.
They have the expertise to identify potential issues and can provide necessary repairs or replacements.
Additionally, using good-quality wiring materials during installation could prevent the occurrence of such faults.
Always hire a licensed electrician for your wiring needs. Regular inspection and maintenance are indispensable for electrical safety.
Using high-quality materials ensures the longevity and reliability of your electrical system.
3. Broken Fan Motor
Causes
A fan motor may malfunction due to an accumulation of dust and debris, disrupting the rotating mechanism.
Overuse or aging components can also lead to overheating, causing damage to the motor’s internal parts.
Electrical issues such as faulty wiring or a power surge could burn the motor, rendering it inoperable.
Keeping the fan clean, using it appropriately, and ensuring a stable power supply can prevent these problems.
Solutions for a Broken Fan Motor
The primary solution for a broken fan motor is a professional repair or replacement.
If dust accumulation is the cause, a thorough cleaning may restore functionality. In case of overheating, giving the motor time to cool down may help.
If the problem lies in the electrical aspect, engaging a certified electrician to repair the wiring or replace the burnt parts is advisable.
4. Inefficient Dehumidifier
Cause
The inefficiency of a dehumidifier can typically be traced back to a few common causes. One of the primary reasons could be a problem with the humidistat, which is responsible for gauging the humidity level in the room.
A faulty humidistat may cause the dehumidifier to overwork or underwork, leading to inefficient functioning.
Other likely causes could include a clogged filter or a refrigeration issue. These issues prevent the dehumidifier from effectively removing moisture from the air, thus making it inefficient.
Key causes to note: Faulty humidistat, clogged filter, and refrigeration issues.
Solution
Addressing the inefficiency of a dehumidifier primarily involves identifying and rectifying the underlying issues.
In case of a faulty humidistat, consider replacing it or seeking professional help for repair. For a clogged filter, regular cleaning or total replacement (if required) can restore the dehumidifier’s efficiency.
If the issue lies with the refrigeration system, professional intervention is often necessary as it involves complex procedures beyond the scope of routine maintenance.
Recommended solutions: Repair or replace faulty humidistat, clean or replace clogged filter, and seek professional help for refrigeration issues.
5. Incorrect Thermostat Settings
Cause
The primary cause of incorrect thermostat settings often revolves around user error.
Individuals may unintentionally set the temperature too high or too low, leading to an uncomfortable indoor climate and potentially increased energy costs.
Faulty installation or an outdated thermostat can also contribute to this issue, as can a mismatch between the thermostat and the heating or cooling system.
Solution
To rectify incorrect thermostat settings, start by verifying the temperature settings are accurate and aligned with the current season.
If the thermostat is outdated, consider upgrading to a modern, programmable model that automatically adjusts temperatures based on the time of day.
Should issues persist despite these actions, consult a professional HVAC technician to assess the situation and provide an effective solution.
6. Worn Out Seals
Cause
Worn-out seals are often the result of prolonged use and exposure to harsh conditions, which degrade the seal material over time.
This can lead to inefficiencies in the system, causing leaks and operational disruptions.
It’s important to understand that neglecting regular maintenance and operating beyond recommended parameters can accelerate seal wear.
Solution
The solution to worn-out seals resides in routine inspection and timely replacement. Implementing a rigorous maintenance plan ensures early detection of wear and tear, preventing costly system failures.
Using high-quality seal materials suited for specific operating conditions can significantly prolong seal life.
Regular seal replacements are a small investment in maintaining system integrity and performance.
7. Overloaded Cabinet
Cause
Overloading a cabinet can result from several factors, primarily being the accumulation of unnecessary items or the lack of proper organization.
Poor space utilization can lead to a cluttered environment which not only strains the cabinet’s structure but can also cause difficulties in locating items when needed.
An overloaded cabinet is not merely an inconvenience; it poses potential risks such as toppling over or causing personal injury.
Solution
Addressing the issue of an overloaded cabinet requires a two-pronged approach.
Firstly, decluttering is essential; this involves removing redundant items, resulting in more available space.
Secondly, implementing an effective organization method is beneficial. This could be as simple as grouping similar items together, or as detailed as labeling each shelf.
Investing in space-saving techniques and accessories can significantly enhance the cabinet’s functionality and lifespan.
8. Damaged Control Panel
Cause
The primary causes for control panel damage often include power surges, exposure to extreme temperatures, or even physical impacts.
Prolonged and unmonitored usage can also lead to system overheating, causing significant and sometimes irreversible damage to the control panel.
Solution
To fix a damaged control panel, the first step is to turn off the system to prevent further damage.
Then, it would be best if you considered reaching out to a certified professional to assess the extent of the damage.
9. High Ambient Humidity
Cause
High ambient humidity is typically caused by environmental factors such as geographic location, climate, and weather conditions.
For example, coastal regions and tropical areas often experience high levels of humidity due to the proximity to large bodies of water and high temperatures.
Indoor conditions can also contribute to high humidity, such as poor ventilation, excessive use of water in daily activities, or even specific types of heating systems.
Solution
To address the problem of high ambient humidity, there are several effective solutions. One of the most common is the use of a dehumidifier, which reduces humidity levels by removing water from the air.
Further, improving ventilation, particularly in areas of the home where water is frequently used like the kitchen or bathroom, can significantly reduce humidity.
Another important solution is to maintain your heating and cooling systems properly, as these can often contribute to humidity when not functioning correctly.
Weatherproofing your home, particularly in areas prone to high humidity, can also be an effective measure.
10. Insufficient Air Circulation
Cause
Insufficient air circulation occurs when airflow within an enclosed space is limited or obstructed, often due to inadequate ventilation systems, crowded interiors, or blocked air outlets.
This can lead to a buildup of pollutants and a decrease in air quality, negatively impacting the health and comfort of inhabitants.
Poor air circulation can potentially exacerbate respiratory conditions and increase the risk of airborne diseases.
Solution
The solution to insufficient air circulation lies in improving ventilation and promoting air movement.
This can be achieved by installing efficient HVAC systems, regular maintenance of these systems, decluttering spaces, and ensuring air outlets are unobstructed.
Incorporating natural ventilation, such as opening windows and doors, can also significantly enhance air circulation.
In the long term, designing buildings with good ventilation can be an effective preventive measure.
11. Infrequent Use of Cabinet
Cause of Infrequent Use
The primary cause of infrequent cabinet use can often be attributed to poor organization. In many instances, the back of a cabinet becomes a “black hole” where seldom-used items get lost.
Another reason could be the lack of accessibility if the cabinet is positioned too high or too low.
Poor organization and lack of accessibility are significant factors contributing to the infrequent use of cabinets.
Solution
To address this issue, consider implementing a system of organization that suits your needs. Use shelf dividers, storage boxes, and labels to segregate items and keep track of where everything is.
Secondly, try to place frequently used items in easily accessible locations. If the cabinet is too high or low, use a footstool or rearrange the cabinet’s contents.
Effective organization and strategic placement of items can enhance the functionality of your cabinet, encouraging more frequent use.
12. Misplacement of Items
Cause
Misplacement of items often occurs due to a lack of organization or memory lapse.
It’s a common occurrence, especially in busy environments where multiple tasks demand our attention simultaneously.
Without proper planning and management, items can easily be misplaced leading to frustration and wasted time.
Solution
Implementing an effective organizational system can mitigate the problem of misplacement. This includes assigning specific locations for items and maintaining their arrangement consistently.
Regular decluttering and ensuring everything has its place greatly enhances efficiency and reduces the chances of items being misplaced.
Utilizing tools and apps designed for item tracking can also be a valuable aid.
13. Poor Maintenance
Cause
Poor maintenance is often the result of neglect and failure to regularly inspect and address issues.
Over time, this can lead to equipment failure, structural issues, or even safety hazards.
Ignoring routine upkeep can lead to substantial damage, ultimately costing more in the long run.
Solution
The solution to poor maintenance lies in regularly scheduled inspections and proactive responses to minor issues before they escalate.
Investing time and resources into preventive measures not only preserves the condition of assets but also extends their lifespan and performance.
By taking action early, we can avoid the costlier consequences of neglect.
14. Aging of the Cabinet
Cause
One of the primary reasons for the aging of cabinets is constant exposure to moisture and fluctuations in temperature.
Over time, these factors can lead to warping, discoloration, and a general deterioration of the cabinet material.
High humidity levels, in particular, can have a significant effect, often resulting in the expansion of cabinet materials and, subsequently, damage.
Solution
To combat this, it’s essential to maintain a stable and suitable environment for your cabinets. This involves controlling the humidity levels in your home and ensuring adequate ventilation.
Additionally, regular cleaning and maintenance can prevent the accumulation of moisture and grime that contribute to aging.
Using high-quality sealants and finishes, designed to protect the cabinet surfaces, can greatly extend the lifespan of your cabinets.
Regular inspections can also help detect any early signs of aging, allowing for timely repairs and preventing further damage.
15. Factory Defects
Cause
Factory defects are typically the result of irregularities or errors that occur during the manufacturing process.
This could be due to the use of substandard materials, flawed designs, or mishaps in the production line.
Key factors contributing to factory defects involve inadequate quality control measures and lack of skilled labor.
Solution
To mitigate factory defects, it’s crucial to implement stringent quality control measures and regular equipment maintenance.
The use of advanced technology can help detect potential defects at an early stage. Staff training is equally important, equipping workers with the necessary skills to minimize errors.
Resolving factory defects not only improves product quality but also enhances customer satisfaction and brand reputation.
Conclusion
It’s evident that the cornerstone of any successful endeavor lies in a deep-rooted commitment, unwavering dedication, and ceaseless pursuit of excellence.
Success isn’t a destination but a continuous journey of growth, adaptation, and learning. Embrace challenges as opportunities, turning obstacles into stepping stones.
Ultimately, it’s the resilience, passion, and integrity that distinguish the good from the great.
As we move forward, let’s continue to uphold these values and strive to reach new heights of achievement, setting new benchmarks and exceeding expectations.
FAQs
How do I know if my dry cabinet is working?
You can verify the functionality of your dry cabinet by checking if it maintains a consistent humidity level over time.
Most dry cabinets come with a built-in hygrometer which displays the current humidity level. If the humidity remains steady within the set range, your dry cabinet is working properly.
What is the mechanism of the dry cabinet?
A dry cabinet operates through the use of desiccants, materials that naturally absorb moisture from the air.
It works by creating a closed environment where the desiccants maintain a low and stable level of humidity, providing ideal storage conditions for sensitive items like camera equipment or electronic components.
How do you control humidity in dry cabinets?
Humidity in dry cabinets can be controlled via an adjustable knob or a digital control panel, depending on the model.
You can set your desired humidity level, and the cabinet will automatically adjust its internal conditions to reach and maintain this level.
What temperature should a dry cabinet be set at?
The optimal temperature for a dry cabinet largely depends on what is being stored.
For photographic equipment and electronics, a temperature range of 20-25 degrees Celsius (68-77 degrees Fahrenheit) is often recommended.
However, always refer to the manufacturer’s instructions or consult with a professional for specific storage conditions.

Name: Joseph Title: Owner and Founder Website: myappliancegeek.com
Biographical Info:
Joseph, the creative mind and founder behind myappliancegeek.com is a distinguished expert in the field of home appliances and technology.
Education: Joseph holds a prestigious degree in Appliance Engineering from a renowned institution in the United States, [Stanford University], where he gained a profound understanding of appliance design, mechanics, and technology.
Professional Experience: Joseph’s professional journey spans over [18 ] years in the home appliance industry. His extensive experience includes working with industry-leading appliance manufacturers, prominent retailers, and appliance repair services.
Entrepreneurship: In [2000], Joseph founded myappliancegeek.com, a platform dedicated to providing comprehensive information, advice, and solutions for those seeking guidance in the world of appliances.
Passion for Appliances: Joseph’s unwavering passion for home appliances stems from his belief in their pivotal role in improving our quality of life.
Contributions to the Industry: Joseph’s commitment to the home appliance industry is evident through his extensive writing and speaking engagements.
Community Involvement: Joseph is not only an online presence but also an active member of the community, frequently engaging in outreach programs, local workshops, and charitable initiatives.